Discover the secret to the best Hidden Gem Bars! This easy recipe features a chocolate shortbread crust and a gooey salted caramel center.
There is something undeniably magical about discovering a place or a flavor that feels like a well-kept secret. In the culinary world, few things spark joy quite like a dessert that looks simple on the outside but holds a delicious surprise within. That is exactly the philosophy behind these Hidden Gem Bars. While the name might sound like a guide to the city’s best speakeasies, in this context, we are talking about a decadent layered dessert that deserves a spot in your recipe box.
These bars are the ultimate crowd-pleaser, combining the rich depth of chocolate, the buttery crunch of a shortbread crust, and a gooey, salted caramel center that truly makes them “hidden gems.” Whether you are an experienced baker or a novice looking to impress, this guide will walk you through creating a treat that looks professional but is surprisingly simple to execute. Get ready to bake the new star of your dessert table.
What Are Hidden Gem Bars?
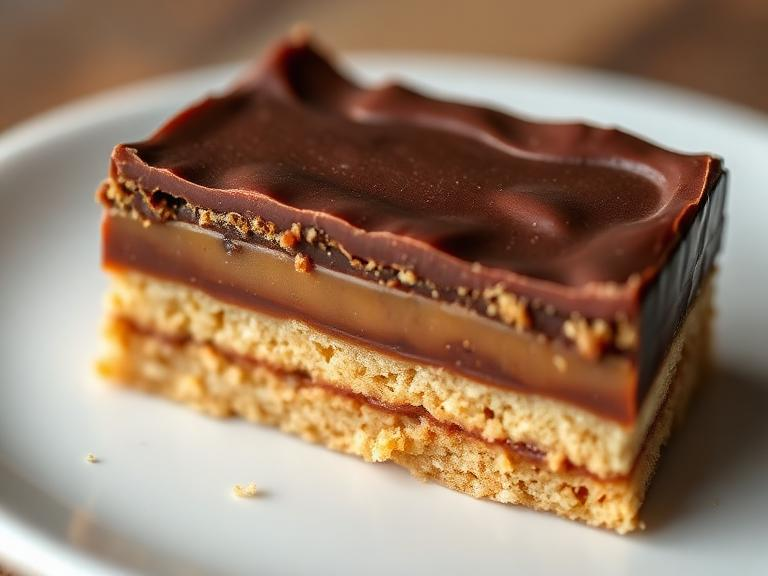
Before we dive into the mixing bowls, let’s define what makes these treats so special. Hidden Gem Bars are a layered dessert bar consisting of three distinct components: a sturdy chocolate shortbread base, a soft and chewy caramel middle layer, and a rich chocolate crumble topping.
The concept is similar to a “magic bar” or a “millionaire’s shortbread,” but with a specific twist on texture and flavor balance. The “hidden” aspect comes from the luscious caramel layer tucked away between the crust and the topping. When you bite into the bar, you get a crunch followed immediately by a soft, melting sensation. They are called “gems” because they are often cut into small, rich squares that sparkle with a hint of sea salt on top.
Why You Will Love This Recipe
If you need convincing to turn on your oven today, here are a few reasons why this recipe is a winner:
- Texture Heaven: The contrast between the crisp crust, the chewy caramel, and the soft chocolate top is texturally perfect.
- Make-Ahead Friendly: These bars store incredibly well, making them perfect for parties or holiday gifting.
- Customizable: You can easily swap ingredients to suit your taste, which we will discuss in the variations section.
- Impressive Presentation: They look like they came from a high-end bakery, requiring minimal decorating skills.
The Essential Ingredients
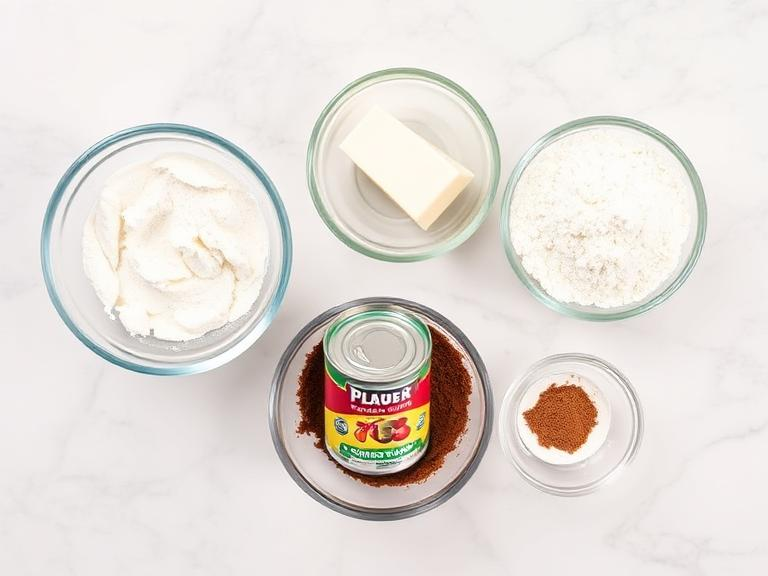
To create the best Hidden Gem Bars, quality matters. Since the ingredient list is short, each component shines through.
For the Chocolate Shortbread Crust
- Unsalted Butter (1 cup, cold): Cold butter is crucial for creating a flaky, sturdy crust that can hold the heavy caramel layer.
- All-Purpose Flour (1 ½ cups): The structure of the crust.
- Cocoa Powder (⅓ cup): Use unsweetened cocoa powder for a deep, dark chocolate flavor that balances the sweet caramel.
- Granulated Sugar (⅓ cup): Adds just the right amount of sweetness to the base.
- Salt (½ tsp): Enhances the chocolate flavor.
For the Hidden Caramel Layer
- Sweetened Condensed Milk (1 can / 14 oz): This is the secret weapon. It creates a smooth, creamy caramel without the stress of boiling sugar.
- Butter (2 tbsp): Adds richness to the filling.
- Light Brown Sugar (½ cup): Provides that classic caramel molasses flavor.
- Vanilla Extract (1 tsp): Always use pure vanilla extract for the best aroma.
For the Chocolate Crumble Topping
- Semi-Sweet Chocolate Chips (1 cup): The crowning glory.
- Sea Salt Flakes: A finishing touch that elevates these from a simple snack to a gourmet experience.
Kitchen Equipment Needed
You don’t need fancy gadgets to make these Hidden Gem Bars, but having the right tools makes the process smoother.
- 9×9-inch Baking Pan: This size yields the perfect thickness. If you use a larger pan, your bars will be too thin.
- Parchment Paper: Essential for lifting the bars out of the pan cleanly.
- Food Processor (Optional): Great for pulsing the crust ingredients, but you can also use a pastry blender or your fingers.
- Heavy-Bottomed Saucepan: For making the caramel filling to ensure even heating and prevent burning.
Step-by-Step Cooking Instructions
Now, let’s get baking! Follow these steps carefully to achieve the perfect layers.
Step 1: Prepare the Pan and Crust
Preheat your oven to 350°F (175°C). Line your 9×9-inch baking pan with parchment paper, leaving an overhang on the sides to act as handles. This is the “sling” method, which makes removing the bars effortless later.
In a large bowl or food processor, combine the flour, cocoa powder, granulated sugar, and salt. Add the cold, cubed butter. Pulse or rub with your fingers until the mixture resembles coarse breadcrumbs. Press this mixture firmly and evenly into the bottom of the prepared pan. Prick the crust all over with a fork to prevent air bubbles.
Bake the crust for 12–15 minutes. It should look set and dry. Remove from the oven and set aside, but do not turn off the oven.
Step 2: Create the Hidden Caramel Filling
While the crust is baking, start the filling. In a medium saucepan over medium-low heat, combine the sweetened condensed milk, butter, and brown sugar. Stir constantly with a heat-proof spatula or whisk.
Continue to cook for about 5–8 minutes. The mixture will begin to bubble and thicken. You are looking for a consistency that coats the back of a spoon. Do not walk away during this step, as milk-based mixtures can scorch quickly. Once thickened, remove from heat and stir in the vanilla extract and a pinch of salt.
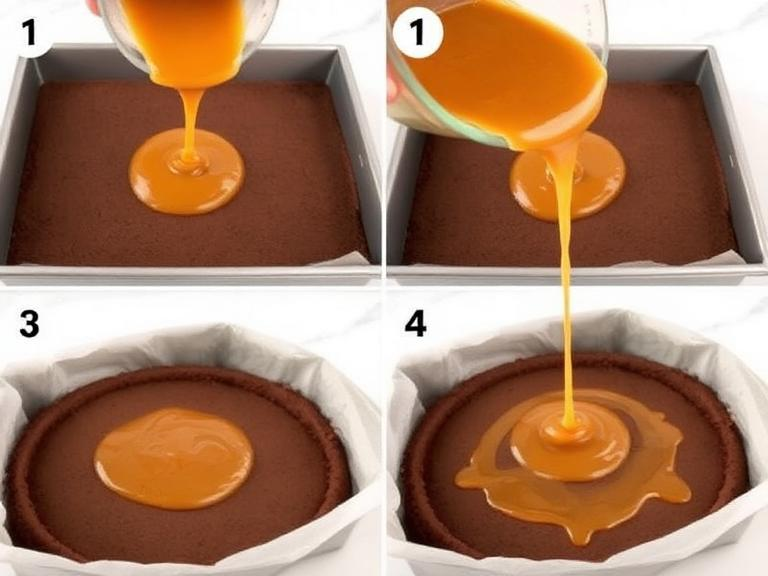
Step 3: Assemble and Bake
Pour the hot caramel filling over the warm chocolate crust. Spread it out evenly with your spatula, ensuring it reaches all the corners. This hot filling on a warm crust helps prevent the layers from separating later.
Sprinkle the semi-sweet chocolate chips evenly over the top of the caramel. Return the pan to the oven and bake for another 15–20 minutes. The caramel will bubble at the edges, and the chocolate chips will melt into a glossy layer.
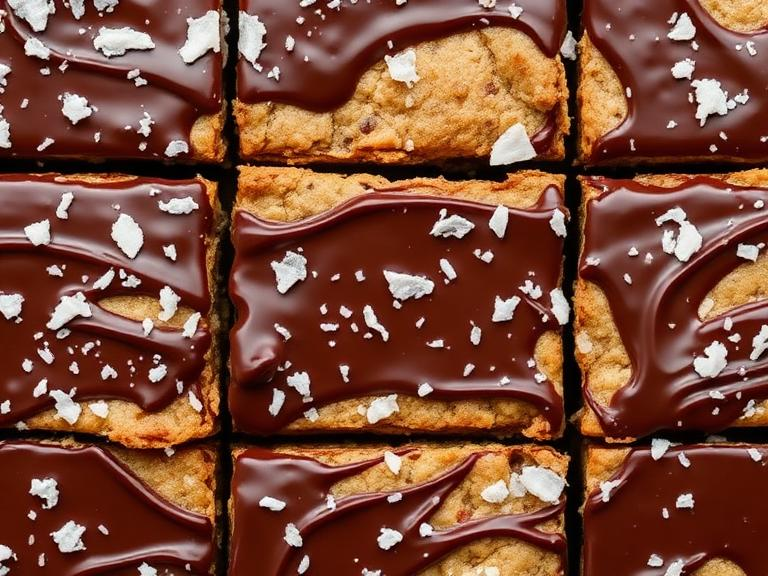
Step 4: The Finishing Touch
Remove the pan from the oven. If the chocolate chips have melted but aren’t fully spread out, you can gently swirl them with a knife for a marbled effect, or spread them into a solid layer. Immediately sprinkle the top with sea salt flakes. The salt is key—it cuts through the sweetness and highlights the “gem” quality of the dessert.
Pro Cooking Tips for Success
Baking is a science, and small details can make a big difference. Here are my top tips for ensuring your Hidden Gem Bars turn out perfectly every time.
- Don’t Overbake the Crust: The crust goes back into the oven with the filling, so the initial bake should be just enough to set it. If it looks dry and matte, it’s done.
- Stirring the Caramel: When making the condensed milk caramel, patience is key. Keep the heat at medium-low. High heat will cause the sugars to seize or burn.
- Cooling is Non-Negotiable: This is the hardest part. You must let the bars cool completely in the pan—preferably for at least 3 hours or overnight. If you try to cut them while warm, the caramel will ooze out and make a mess. For clean cuts, chill the slab in the fridge for 30 minutes before slicing with a sharp knife.
Delicious Variations to Try
Once you have mastered the classic Hidden Gem Bars, try switching things up with these variations:
- Nutty Surprise: Add a layer of chopped pecans or walnuts between the crust and the caramel for a crunch that mimics a turtle candy.
- Peanut Butter Twist: Swap the semi-sweet chocolate chips for peanut butter chips, or swirl a tablespoon of peanut butter into the caramel filling.
- Mocha Gem: Dissolve 1 teaspoon of instant espresso powder into the hot caramel mixture for a coffee kick that pairs beautifully with chocolate.
- White Chocolate Raspberry: Use a raspberry jam layer instead of caramel, topped with white chocolate chips for a fruity, tart version.
Storage and Make-Ahead Tips
These bars are excellent for meal prep or gifting because they store so well.
- Room Temperature: Store cut bars in an airtight container with parchment paper between layers for up to 3 days. Keep them away from direct sunlight or heat sources.
- Refrigerating: In the fridge, they will keep for up to a week. The texture will become firmer and chewier, which many people actually prefer.
- Freezing: These Hidden Gem Bars freeze beautifully. Wrap the uncut slab or individual bars tightly in plastic wrap and then foil. Freeze for up to 3 months. Thaw in the refrigerator overnight before serving.
Serving Suggestions
While these bars are rich enough to stand alone, serving them with intention can elevate the experience.
- A La Mode: Serve a warm bar with a scoop of vanilla bean ice cream. The contrast between the hot, gooey caramel and ice cream is irresistible.
- Coffee Pairing: Serve these as an afternoon treat alongside a strong espresso or a flat white. The bitterness of the coffee balances the intense sweetness of the caramel.
Common Mistakes to Avoid
To ensure your baking journey is smooth, avoid these common pitfalls:
- Using a Dark Pan: Dark metal pans conduct heat faster than glass or light metal pans. If you use a dark pan, reduce the oven temperature by 25°F to prevent the crust from burning.
- Slicing Warm Bars: We mentioned this in tips, but it bears repeating. Cutting warm caramel bars results in a sticky mess. Cold caramel cuts cleanly.
- Skipping the Salt: The salt is not just a garnish; it is a flavor enhancer. Without it, the bars may taste cloyingly sweet.
Conclusion
Baking should be an adventure, and these Hidden Gem Bars are the perfect destination. They offer that rare combination of sophisticated flavor and approachable technique. Whether you are bringing them to a potluck, wrapping them up as gifts, or simply enjoying a quiet moment with a cup of coffee, they are sure to become a repeat request in your household. The hidden caramel center is a delightful surprise that lives up to the name, proving that the best treasures are often the ones you make yourself.
FAQ Section
Can I use store-bought caramel sauce instead of making the filling?
While you can use store-bought caramel sauce, it is not recommended for this recipe. Jarred caramel sauces are often too thin and runny to set properly into a bar format. The sweetened condensed milk method creates a thicker, fudge-like consistency that holds its shape when cut, which is essential for Hidden Gem Bars.
Why are my bars crumbling when I cut them?
If your bars are crumbling, it is likely because the crust was overbaked or the bars were cut while they were too cold. If the crust is overbaked, it becomes brittle. To fix the cutting issue, let the bars sit at room temperature for 15 minutes before slicing if they have been in the fridge. Use a serrated knife and a gentle sawing motion.
Can I double this recipe?
Yes, this recipe doubles very well. You can bake a double batch in a 9×13-inch pan. Keep the baking time the same for the crust, but you may need to add an extra 5–10 minutes to the final bake time to ensure the center sets properly.
Related Posts

Boba Powder Mix: The Ultimate Guide to Bubble Tea Ingredients
Discover everything about boba powder mix its benefits, drawbacks, uses,…

North vs South Indian Cuisine: What Really Sets Them Apart?
Indian food is not one single style of cooking. It…

10 Irresistible Candies That Start With V: Ultimate 2025 Guide for Candy Lovers
Discover 10 delicious candies that start with V, from Violet…