Maximize your space with these creative kitchen storage ideas. From pantry hacks to DIY solutions, learn how to organize your kitchen like a pro.
Smart Kitchen Storage Ideas: Transform Your Chaos into Culinary Order
There is a specific kind of frustration that bubbles up when you are in the middle of a recipe, perhaps trying to find that one specific jar of cumin or the lid to your favorite pot, and you cannot find it. We have all been there—digging through cluttered drawers, knocking over bottles of olive oil, and creating a mess to find a single utensil. A disorganized kitchen doesn’t just kill your cooking vibe; it wastes time, leads to food waste, and makes meal prep feel like a chore rather than a joy.
But imagine walking into a kitchen where every spice has a home, your pantry is a visual delight, and your countertops are clear and ready for action. This isn’t a fantasy reserved for interior design magazines; it is achievable with the right strategy. By implementing smart kitchen storage ideas, you can reclaim your space and turn your kitchen into the efficient, peaceful heart of your home. Whether you have a sprawling chef’s kitchen or a cozy apartment galley, these solutions will help you cook with clarity.
The Golden Rule: Declutter Before You Organize
Before you buy a single bin or hook, you must purge. One of the biggest mistakes people make when looking for kitchen storage ideas is organizing items they don’t actually need or use. This leads to “organized clutter.”
Start by emptying one zone at a time—perhaps the pantry first. Check expiration dates on dry goods. If you have spices from five years ago or three jars of the same jam open in the fridge, consolidate or toss. For utensils and gadgets, ask yourself: “Have I used this in the last year?” If the answer is no, donate it. Clearing out the excess creates the physical and mental space necessary for a truly functional storage system.
Maximize Vertical Space with Shelf Risers
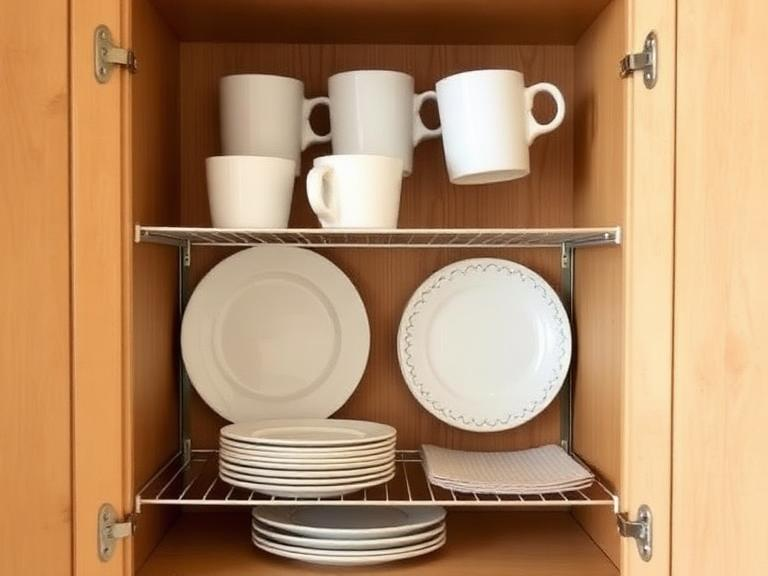
Most standard kitchen cabinets leave significant vertical space unused. If you have tall cabinets but short stacks of plates, you are losing valuable real estate. One of the simplest yet most effective kitchen storage ideas is using shelf risers.
These wire or acrylic platforms instantly double your shelf space. You can stack plates or bowls on the bottom and use the top tier for mugs, small appliances, or pantry staples. This method keeps items visible and prevents the dreaded “tower of Tupperware” from toppling over every time you open the door.
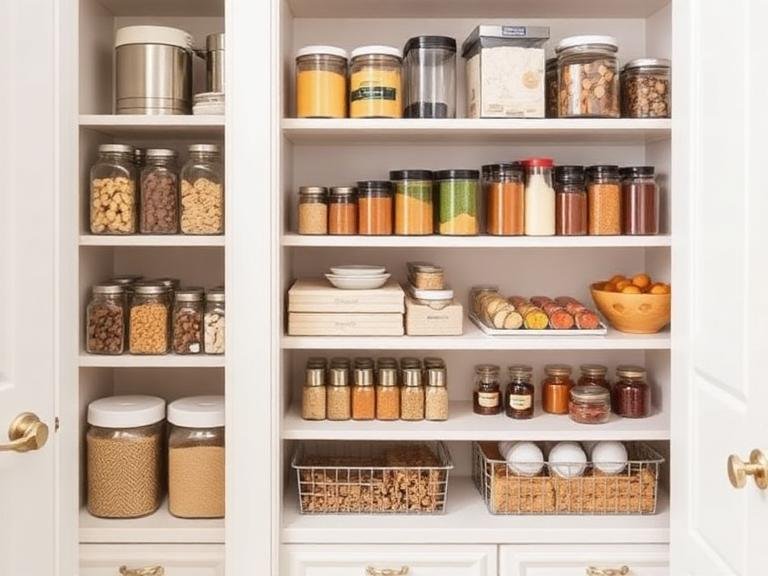
The Magic of Clear, Square Containers
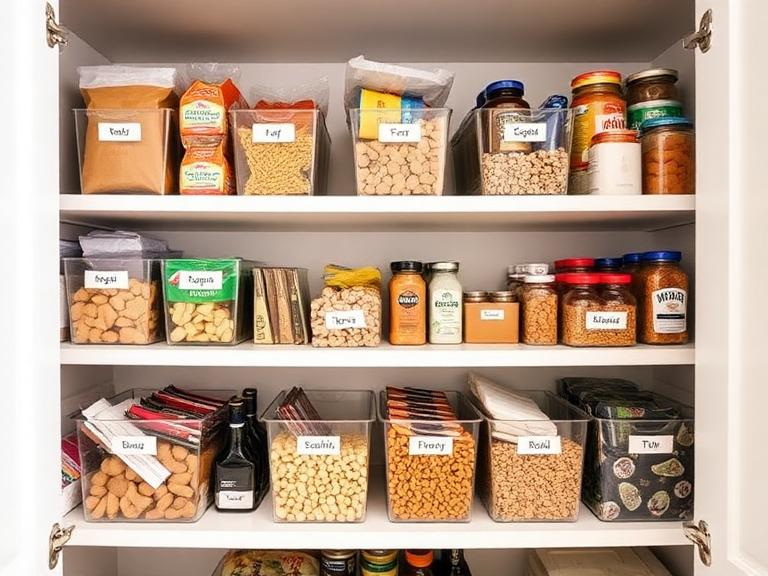
When it comes to dry goods, packaging is often the enemy of organization. Bulky bags of pasta, half-empty cereal boxes, and plastic-wrapped snacks occupy uneven space and obscure their contents. Transferring these items into clear, square containers is a game-changer.
Square containers fit flush against one another, making the most of your pantry depth, unlike round containers that leave gaps. Seeing exactly how much flour or rice you have left prevents over-buying and helps you keep inventory at a glance. This is one of those kitchen storage ideas that looks aesthetically pleasing and functionally superior.
DIY Pantry Jar Labels
Ingredients/Materials:
- Chalkboard paint or a label maker.
- Clean, dry glass jars (repurposed pasta sauce jars work great).
- Painter’s tape.
- Chalk or marker.
Instructions:
- Clean the Jars: Ensure your jars are thoroughly washed and dried. Any moisture left can spoil your dry goods. Remove old labels by soaking the jars in warm, soapy water and scrubbing with a rough sponge.
- Tape the Area: Use painter’s tape to mark a square or rectangle on the front of the jar where you want the label to be.
- Apply Paint: Apply two coats of chalkboard paint within the taped area. Let it dry completely between coats.
- Season the Chalk: Rub the side of a piece of chalk along the painted area, then wipe it off. This season, the surface is so future writing doesn’t leave permanent ghost marks.
- Label: Write the contents (e.g., “Quinoa,” “Lentils,” “Powdered Sugar”) and the date of purchase.
Zone Defense: Grouping Like Items
Professional organizers swear by zoning. This means grouping items by function. Instead of storing your baking supplies across multiple shelves, designate a dedicated baking zone. This should include flour, sugar, baking powder, chocolate chips, and extracts.
Similarly, create a “Breakfast Zone” for cereals, oats, and coffee, and a “Cooking Zone” for oils, vinegars, and commonly used spices. This logic saves you steps while cooking. When your kitchen storage ideas are based on workflow, you naturally become a more efficient cook.
Drawer Dividers and Utensil Organization
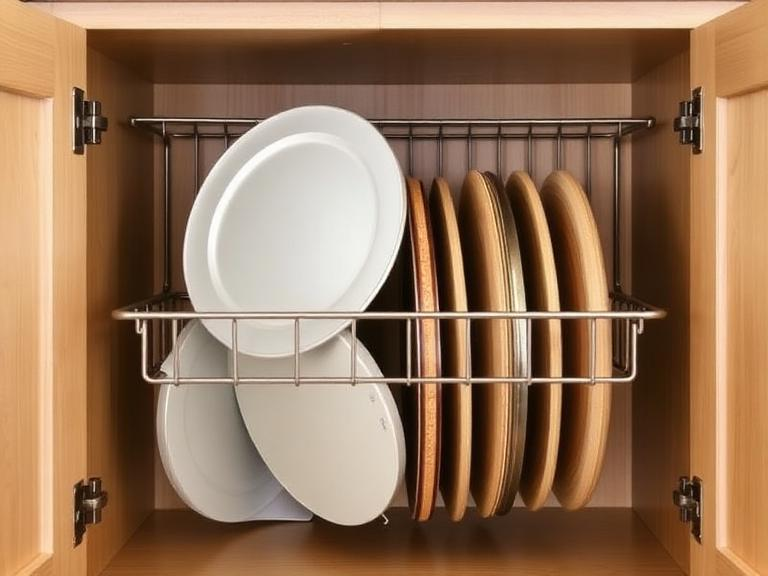
The “junk drawer” is a universal kitchen phenomenon, but it doesn’t have to be. Deep drawers are perfect for storing plates and bowls, while shallow top drawers need structure to hold utensils.
Ditch the standard pre-molded plastic trays that never quite fit your specific collection of spatulas and whisks. Instead, opt for individual, expandable drawer dividers. You can move them around to create custom slots for your specific tools. This is particularly helpful for oddly shaped items like ladles or tongs.
Taming the Tupperware Drawer
Food storage containers are notorious for causing headaches. To address this, nest containers by size and store the lids separately. Use a small bin or a plate stand to file the lids vertically, like records in a record player. This prevents plastic from falling out every time you open the drawer.
Utilizing the Inside of Cabinet Doors
We often look at the shelves inside a cabinet, forgetting that the door itself is a valuable surface. Installing adhesive hooks or a small rack on the inside of a cabinet door is one of the most budget-friendly kitchen storage ideas.
- Pot Lids: Use a tension rod or a file organizer rack to hold pot lids upright.
- Cutting Boards: Command hooks can hold lightweight cutting boards.
- Cleaning Supplies: Keep spray bottles off the floor by mounting a rack on the inside of the under-sink cabinet door.
Corner Cabinet Solutions: The Lazy Susan
Corner cabinets are often the “black holes” of the kitchen, where appliances go to die because they are too hard to reach. To address this, use a classic Lazy Susan (turntable).
A Lazy Susan allows you to spin items to the front without reaching deep into the dark corners. They are fantastic for oils, vinegars, sauces, and heavy appliances. If you have a budget for a renovation, look into “pull-out” shelves that slide the entire depth of the cabinet out to you. However, for a quick fix, the turntable remains one of the most reliable kitchen storage ideas for awkward angles.
Under-Sink Organization Hacks
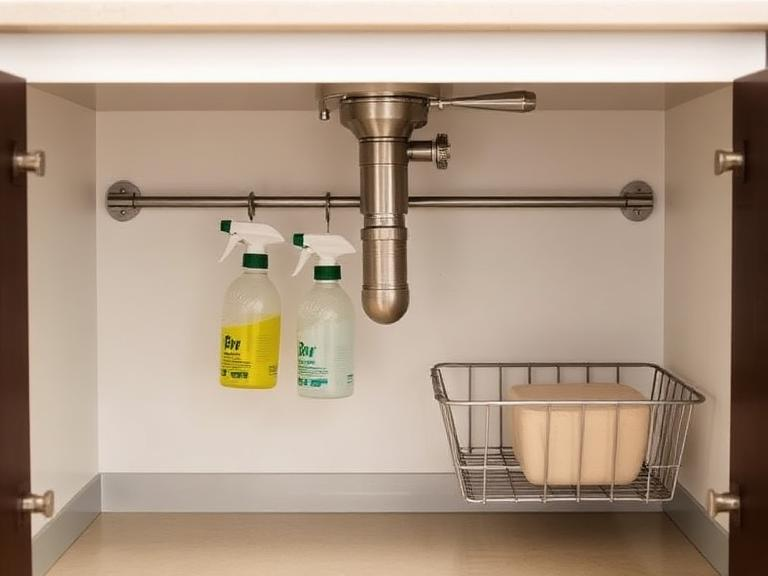
The area under the sink is often a chaotic jumble of cleaning sprays, sponges, and garbage bags. The pipes create an awkward obstacle course for storage. To optimize this space, use a two-tier sliding basket organizer that fits around the pipes.
Additionally, use a tension rod near the top of the cabinet to hang spray bottles. This frees up cabinet floor space for a small trash can or a basket of sponges. Keeping this area organized is crucial for spotting leaks early, which can save you from costly plumbing repairs over time.
Countertop Clutter Control
While cabinets and drawers are essential, countertops are your primary workspace. If your counters are cluttered with appliances you rarely use (looking at you, bread maker), you lose prep space.
Limit your countertops to items you use daily, such as a coffee maker, a toaster, and perhaps a fruit bowl. For items you use occasionally, store them in the appliance garage or the back of a lower cabinet. If you must keep utensils on the counter, use a weighted stainless-steel crock so it doesn’t tip over. Remember, clear counters make a small kitchen feel larger and more inviting.
Label Everything: The Key to Maintenance
You can have the best kitchen storage ideas in the world, but if no one knows where things go, the system will fail. Labeling is the glue that holds your organization together.
Use a label maker, chalkboard labels, or even a piece of masking tape and a Sharpie. Label the shelves in the pantry (e.g., “Snacks,” “Pasta”), the bins in the fridge, and the containers in your drawers. When family members unload the dishwasher or put away groceries, the labels guide them, ensuring your hard work stays organized for months to come.
Cooking Tip: FIFO Method
When restocking your newly organized pantry, remember the “First In, First Out” rule. Place newer items behind older ones. This ensures you use up older staples before they expire, reducing food waste. This habit pairs perfectly with clear storage containers, as you can easily see when supplies are running low.
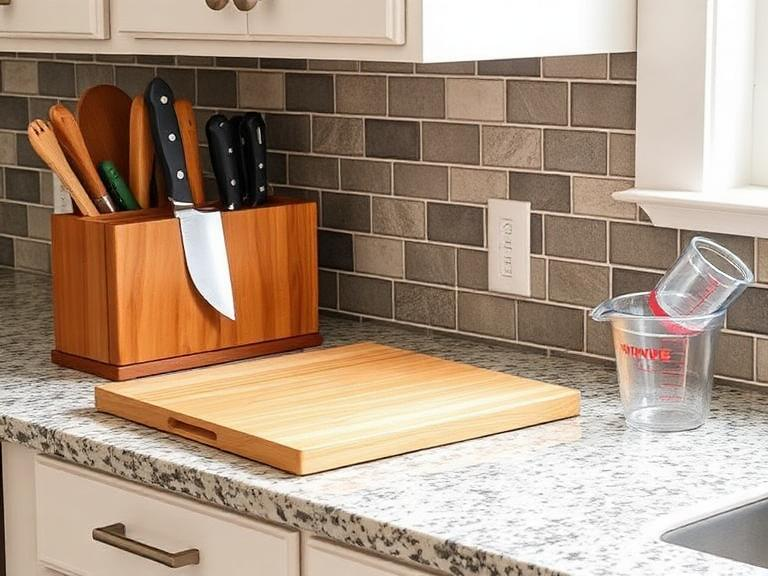
Creating a “Prep Station”
Finally, consider creating a dedicated prep station. This is a section of your counter or a specific cabinet that houses all your prepping tools in one spot. Think cutting boards, knives, measuring cups, and mixing bowls. By localizing these items, you streamline the cooking process. Instead of running back and forth across the kitchen to grab a measuring cup while your garlic burns, you have everything within arm’s reach.
By implementing these kitchen storage ideas, you transform your kitchen from a source of stress into a sanctuary of efficiency. Remember, organization is not a one-time event but a process. Start small, tackle one drawer or shelf at a time, and enjoy the satisfaction of a kitchen that works for you.
FAQ Section:
Q: How do I organize a small kitchen with no pantry?
A: If you lack a dedicated pantry, turn to open shelving or repurpose a nearby closet. Use the inside of cabinet doors for extra storage and invest in a rolling utility cart that can act as a movable pantry. Vertical stacking and magnetic knife strips can also free up valuable counter and drawer space.
Q: What is the best way to store plastic food containers?
A: The best method is to nest the bowls inside one another and store the lids separately. You can use a file organizer to stand the lids up vertically in a drawer or cabinet. This prevents the messy “container avalanche” often associated with Tupperware storage.
Q: How often should I reorganize my kitchen storage?
A: A deep reorganization should happen about once a year to declutter expired food and unused gadgets. However, a light maintenance check—tossing expired pantry items and wiping down shelves—should be done every 3 to 4 months to keep your systems functioning smoothly.
Related Posts
15 Brilliant & Space-Saving Pantry Storage Solutions for a Clutter-Free Kitchen
Pantry storage solutions that maximize space, improve organization, and keep…

Wine Fridge Cabinet: The Ultimate Guide to Stylish and Smart Wine Storage
Introduction (Problem + Solution) Wine lovers often face a common…

Wine Bottle Refrigerator: The Complete Guide to Proper Wine Storage at Home
Introduction (Problem + Solution) Storing wine correctly is one of…